Orange Pecan Cookies

orange pecan cookies

Apparently, I shouldn’t go on vacation.  Ever since I got back from Austin, I have been getting gradually sicker and sicker.  It sucks, pretty hardcore.  I finally caved and am taking the day off tomorrow, mostly to sleep…because I haven’t been doing any of that lately.

In other news, because of said sickness, I have watched several random movies this evening.  I NEVER just sit on my couch and watch movies, like ever.  I get all sorts of antsy, so I’m usually reading or working on some sort of project.  So naturally, I started baking these cookies tonight while watching movies.  I figured, hell, I pay for all of these channels, might as well watch some!  So far tonight, I’ve watched “Friends with Benefits” “Apollo 13” and now I’m watching “The Other Boleyn Girl”.  This movie is nuts!  Henry VIII was NUTS! But Eric Bana is pretty to look at….so this movie is watchable.

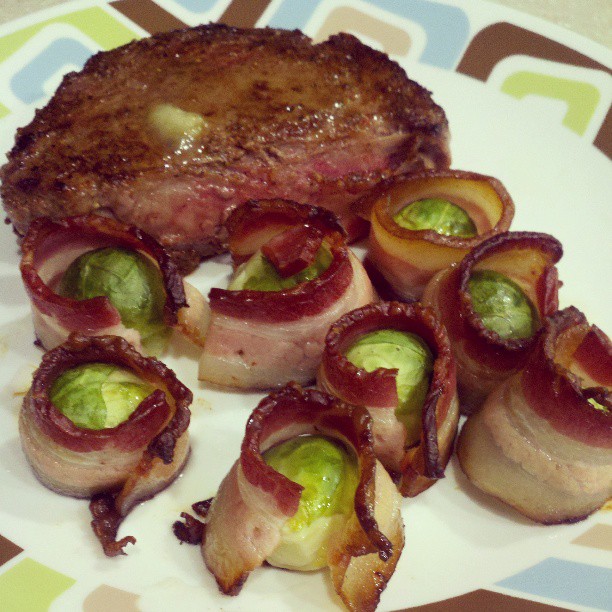
On a slightly sadder note, I think I’m gonna hang up my baking mitts for a while.  Starting Monday, I’m beginning what I’m dubbing the “Cancun Challenge”.  I’m 99% sure I’m going to Cancun in July and I want to look as amazing as possible in the swimsuit I just bought.  Therefore, starting Monday, I’ll be officially doing another Whole30…..which will actually be more like a Whole90.  No more paleo treats for me…..but have no fear, I’ll continue to bring you deliciousness.  It just means I’m going to have to rely heavily on taste testers!

Without further ado, here are these tasty little devils!

Orange Pecan Cookies with Orange Coconut Butter Drizzle

For the Cookies (makes about 5 dozen):

  • 5 cups almond flour
  • 1 teaspoon salt
  • 1 teaspoon baking soda
  • 3/4 cup coconut oil
  • 2 tablespoons vanilla
  • 3/4 cup raw honey
  • zest and juice (about 1/2 cup) from 2 oranges
  • 2 cups chopped pecans (I used dry roasted, unsalted ones)
  1. In a large bowl, mix together all dry ingredients.  Mix in your pecans with the dry mix!
  2. In a smaller bowl, mix together all of your wet ingredients, including the orange juice and the zest from both oranges. (Seriously, invest in a microplane or a zester, the are AWESOME!!)
  3. Mix your wet ingredients into your dry, combining thoroughly.
  4. At this point, I usually refrigerate the cookie dough for at least an hour.  This makes it WAY easier to roll later.
  5. When you are ready to bake your cookies, preheat your oven to 350 degrees.
  6. Roll your dough into walnut sized balls (about 1″) and slightly flatten them.
  7. Place them on a parchment paper lined baking sheet and bake for 7-10 minutes. I let mine go for just under 10 minutes and the were perfection!
  8. LET THEM COOL!!!  For real, let them cool for at least 30 minutes before you even think about putting the drizzle on them.  If you don’t want to top with the drizzle, feel free to smash on these bad boys as soon as they are cooled!

For the Orange Coconut Butter drizzle:

  • 3 tablespoons coconut butter
  • 1 tablespoon coconut oil
  • zest and juice of 1 orange
  • pinch of salt
  • small splash of vanilla (1/8 teaspoon for you measuring types)
  1. Put all ingredients in a small bowl.
  2. Microwave for about 30 seconds.
  3. Stir all together.
  4. Use a spoon to drizzle the mixture over the cookies all fancy like!  Or if you are feeling really fancy, you can make your own “pastry bag” out of a ziploc bag.  Load your drizzle goo into a baggie, seal it, and snip a small amount of the corner off.  Drizzle that deliciousness all over your cookies.
  5. STUFF your face!!

These are simply delightful!  I hope you enjoy them.  I’m trying my best to NOT eat all of them….please send strong willed thoughts my way as I embark on the Cancun Challenge!!  It’s gonna be really tough, especially because I also won’t be drinking….like at all.  Crazy.  I know.  Last time I did that I lost a whole bunch of my friends over it. Meh, oh well!  Sending delicious paleo treat love your way! Peace, Love, and Paleo!

-Meister

Post-Travel Blues and Island Pork Stew

Hey y’all!  Coming to you live…….from my kitchen!  Back from PaleoFX in Austin, TX and holy crap, I can’t say how much I love the Paleo/Primal community.  It was incredibly amazing to spend a long weekend with such an amazing network of scientists and foodies that were all there to enjoy, learn, and spread the same message.  This is definitely an event I will go to again in the future.  I TOTALLY geeked out in some sessions, lived out a couple of  fan girl moments, and met a lot of really, really AWESOMELY paleo peeps.  Check this out!! That’s RIGHT!  I met George, the Civilized Caveman and Juli B. from PaleOMG!  For REAL!!  I almost couldn’t make conversation…..I was a completely stupid mix of first date jitters and 14 year old girl at a Bieber concert.  Major thanks to my girl, Missy, for putting her foot down and making me go say “Thanks for being so awesome!!” to these two.

bloggers

And immediately following this, I had enough guts to go personally thank Sarah Fragoso for doing what she does.  For those that don’t know, it was her book, Everyday Paleo, that I creeped through on my coworker’s desk.  SHE is one of the major reasons I’m living a Paleo life today.  She has been, is now, and will continue to be an inspiration to me.  Needless to say, I’m pretty sure we both got a bit choked up when we were talking…

Me and Fragoso

Austin solidified itself as a magical place in my heart.  It had already been one awesome place to visit, but this weekend just confirmed it!  To the point of me job searching teaching positions in the area, no joke.  In addition to the Paleo goodness, I had the opportunity to reconnect with some incredibly amazing friends.  Seriously, those folks and that town really really vibe with me.  Sitting out on patios, drinking ridiculous cocktails, listening to live music, and discussing the world……It was a little piece of heaven!  I sat in the Austin airport last night really bumming hard about coming home…..more specifically, coming back to real life.  I wish I could just suspend the feeling from the weekend and make it last forever!

Anyways, enough whining about leaving the great state of Texas…..I’ll be back there soon enough!  This recipe is one that I made quite a while ago, but talking to a friend made me remember it!  His own words were, “I love pork, I love pineapple, I love stew!  Check, check, CHECK!  I’m all over it!”  I mean, it is pretty amazing.  So amazing in fact, I’m playing with a variation of it for tomorrow night!  Here is the original!

island pork stew

Island Pork Stew…..in the Crockpot

  • 6 carrots, cut into chunks
  • 6 celery stalks, cut into chunks
  • 1 large onion, cut into chunks
  • 6 cloves garlic, smashed
  • 1 cup fresh pineapple, chunked
  • 1/4 cup apple cider vinegar
  • 4 tablespoons tahini (or you could use sunbutter)
  • 3 tablespoons coconut oil (NOT melted)
  • 1-2 pounds pork (cutlets or boneless chops) cut into large chunks
  • 2 inches fresh ginger, peeled and grated or cut into very small pieces
  • 1 teaspoon red pepper flakes
  • 1/4 teaspoon cayenne pepper (more if you want it spicy!)
  • Salt and Pepper to taste
  1. Chop and layer all veggies into the bottom of the crockpot.
  2. Dump pineapple and ginger in on top of your veggies.
  3. Layer your pork (trimmed of fat, if that’s your thing….or not!) on top to cover your veggies.  You want to make a pretty even layer of pork.
  4. In a small bowl, mix together your tahini, coconut oil, and spices into a paste.
  5. Smear that delicious goodness all over the top of the pork!!  Get messy with it.
  6. Pour your vinegar over the top of the pork.
  7. Set your crockpot to low for 6-8 hours.
  8. When all is bubbly and hot, stir with a large spoon to mix everything up and break down your pork further.
  9. Bowl it up and top with fresh chopped cilantro and scallions!  Or hell, top it with whatever you dig.  Anyway you top it, it’s gonna be freaking delicious!

*** If you are into WICKED hot stuff, toss in a habanero pepper.  Keep it whole and remove it prior to serving.  If you really REALLY like to live on the edge, make a couple of slits in that bad boy with a sharp knife to let more of the oils out into the crockpot while cooking.  Again, don’t say I didn’t warn you, but sometimes, you just gotta get SPICY!  You know I’m right.***

With that, friends, I need to go clean up my disaster of a kitchen and think about going to bed at some point.  Sending much Paleo love from a very VERY full heart……Peace, Love, and Paleo.

-Meister

Laundry, Packing, and bars……GO time!

No, not the drinking kind of bars…although I’m pretty sure a few of those will be involved this weekend, but more like the fruit and nut kind of bars!  Perhaps even venture to call them “knock off” bars…..you know the ones I’m talking about!  Not gonna mention them here….I don’t need to go an get myself flagged, or worse, sued!  Oh the horror!!!  Ain’t NOBODY got time for that!  Anyway, I made these:

larabars

And they were freaking delicious!! So that’s the recipe you all will be granted this evening!

Before I get to that though, times are super exciting!  First of all, I am packing my suitcase (not really yet, but I will be in a little bit) gearing up to head to Austin, TX for a long weekend of Paleo LOVE!!!  Yep, I’m going to the PaleoFX conference. Go ahead and click on that link, find the speakers and schedule tabs and cream your little Paleo jeans.  I’m BEYOND excited!!!  I’m prepared to geek out pretty hardcore, good thing I’ve got my girl Missy with me to keep me in check and out of jail!!

In addition to the conference, Austin may be one of the greatest towns in ALL the land!  I’m pumped to be going back there.  One of my bestest buddies in the whole wide world lives there, and it’s been way too long since I’ve seen his face.  Throw in getting to meet up with one of my totally rad cousins and her BF, and I’m like a fat kid in a cupcake shop!!  Needless to say, this is the EXACT weekend I need before getting into the swing of State Testing at school.

Last bit of exciting news, I picked up these little beauties today!!!

PM shirts

Yep, it’s legit!  I can’t wait to see people reppin’ these!!  Not to mention, the women’s cut ones are completely obnoxious….I mean baby blue/teal with purple screen printing?  I mean, who even suggests that?!?  Oh wait…. MAJOR thanks and props to the guys at Courtyard Ink!  They were totally amazing to work with and created some extremely quality work.  Much love guys, and you are definitely getting any of my business in the future!!

Anyways, enough blabbering!  The bars were super easy to make, did it all in the food processor!  In the future, I’m planning on adding some Paleo protein powder to these bad boys to make protein bars…..oh yeah, that’s happening.  Can’t freaking wait!

Salted Almond Fruit Bars….with a hint of Cocoa

  • 1 pound dates, pitted and chopped into chunks
  • 1/2 cup coconut oil
  • 1 tablespoon unsweetened cocoa powder
  • 1/2 cup unsweetened shredded coconut
  • 1/2 cup almonds, chopped (I used dry roasted ones….salted or unsalted, whatever you dig!)
  • 1/4 teaspoon salt
  • 1/2 teaspoon vanilla
  1. Add your chopped dates to your food processor and pulse until they become a paste.  They will clump into a giant ball, you will have to push it down multiple times….get used to it, you’ll have to do it on almost every single step during these!
  2. Add in your coconut oil, cocoa powder, salt, and vanilla.  Pulse until they are incorporated, again, pressing it down whenever it comes into a ball.
  3. Next add in your shredded coconut and your chopped almonds.  Again, pulse until they are all combined, pushing it down when needed.
  4. Line a square baking pan with parchment paper.  You will want to leave a little hanging over the edges so you can lift your bars out later.
  5. Using your hands (it’s honestly the easiest way….so get down and dirty!) press your mixture into an even layer in your pan.  You want to make sure they are pretty densely packed, mine ended up being about 1/2 inch thick.
  6. Toss that pan in the freezer for at least an hour, a couple if you’ve got the time.
  7. Lift your bars out and slice them to whatever size your heart desires.  I got 12 bars out of mine.
  8. Wrap individually in parchment paper and store in the fridge until you want to smash!

If you want them with more of a chocolate kick, add more cocoa!  Want to use a different nut, get after it!  Live your life.  With that, I’d better get on to actually packing!  I might post some randomness from Austin over the next couple of days, but nothing legit until next week…..most likely.  Please understand, k thanks!  Until then, peace, love, and PALEO y’all!

-Meister

Er-mah-GERD! Chocolate Hazelnut Pie!

chocolate hazelnut pie

For REAL!?!?  I’m not even kidding with this pie when I say that my dad is convinced this could be served in a fine dining establishment.  He will eat almost anything I make, but this one topped his list as “I would NEVER EVEN GUESS this is Paleo!!!”  That made my heart happy…..especially when he said he needed an entire pie, not just the one slice I took him.  I’ve been caught saying that this is the recipe that is gonna land me a husband someday.  It’s completely OUT OF CONTROL!  In fact, I can hear the leftovers whispering to me right now from my fridge.  Not even lying when I say that I’m really, REALLY glad I’ve got myself to a better place in my life….because the old me would have eaten this entire pie with a bottle of wine for dinner and wallowed about how crappy things are.  Not saying that won’t happen at some point this weekend, but STILL!  The fact that there is pie in the fridge at this point is a massive triumph!

Today is the last official day of my Spring Break.  I’m somewhat sad.  I did absolutely nothing, and that was great, but I feel like I also haven’t accomplished much. Eh, gearing up for Austin I guess!  Plus, getting back into the routine of waking up early is not going to be fun!  Oh, and it’s snowing today.  What the HELL, Nebraska?  Get your act together!  I’m beyond over this weather!  I’m counting down the days until I leave for Austin, TX next week.  Which I’m completely STOKED for!  I know I’ve said it before, but seriously, I can’t freaking wait!!

Really not looking forward to Open Workout 13.3, mostly because I hate wallballs.  In fact, hate doesn’t even begin to cover it.  I really like having the ability to walk, especially up and down the stairs……I’m already having nightmares of what my legs will be like after I finish that workout.  It’ll be like my first 2 weeks of CrossFit all over again…….going down the stairs backwards, drowning my quads in Icy Hot, and needing to use the handicapped stall for the sheer purpose of having the grab bars if I need them.  No joke.

Alright, enough of my whining.  On to pie!  This recipe takes a bit of love, but in the end it’s really pretty easy.  I mean, you make the entire thing in the food processor….what could be easier than that??

Chocolate Hazelnut Pie

  • 1 bag Enjoy Life chocolate chunks, split in half
  • 1 cup hazelnuts (I used dry roasted, unsalted from Trader Joe’s….they have a good price!)
  • 1/4 cup coconut flour (plus a bit more to dust your pie pan)
  • 3/4 cup raw honey
  • 1/4 cup hot water (like almost boiling)
  • 4 eggs
  • 1/2 cup coconut oil (not melted)
  • 2 teaspoons vanilla
  • 1/2 teaspoon cinnamon
  • 1/2 teaspoon salt
  1. Preheat your oven to 350 degrees, and make sure you have a rack in the bottom 1/3 of your oven.  It seems weird, but this bad boy needs to cook near the bottom.
  2. In your food processor, place half of your chocolate chunks, your hazelnuts, and 1/4 cup of coconut flour.  Pulse until you get small chunks.  You don’t want them to get too small….this is what gives your pie some crunch.  I would pulse until all pieces are about the same size. Dump this into a separate bowl.
  3. In your now empty processor bowl, add in the rest of your chocolate chunks and your raw honey.  Pulse this until they come together.
  4. While the processor is running on low, slowly add in your hot water and keep blending until all of the chocolate has melted.
  5. Remove the lid and add in your salt, cinnamon, vanilla, coconut oil, and eggs.
  6. Pulse a few times so that it all incorporates.
  7. Now, add back in your chocolate chunk, hazelnut, coconut flour mixture.
  8. Pulse a few times to combine everything.  Not too much though, you don’t want to break your chunks and nuts into smaller pieces.
  9. Pour your batter into a 9 inch pie pan that has been brushed with coconut oil, and dusted completely with coconut flour.  It will almost completely fill the pan, don’t worry!  (I have not tried this in glass, so I would stick to a metal pie pan….I make to guarantees with it baking the same/coming out cleanly with a glass pie plate)
  10. Bake for 35 minutes in the bottom 1/3 of your oven at 350 degrees.
  11. Remove from the oven at 35 minutes, no matter what.  It may not look done in the middle, that is FINE.  It may have risen strangely, that is FINE!  It will all settle itself out, don’t worry!!
  12. Let cool on the counter for an hour.
  13. Refrigerate for at least 2 hours, overnight is great too!
  14. Remove from the fridge about 30 minutes prior to serving!
  15. Top with paleo whipped cream and SMASH!!!

I topped mine with a few fresh blackberries, because I’m currently obsessed with those!  No berry is same in my house…..Not even lying, plan to share this with friends and family, or be prepared to hide it from yourself.  It’s INSANE!! Peace, Love, and Paleo y’all!

-Meister

Chicken Marsala….ish

Well, I’m officially on Spring Break!!  This year is kind of a bizarre year for me, as I’m going no where for the break.  A year ago, I was in Texas.  I believe I was in Austin at this point, doing shots of Fireball with my cousin and one of my best buddies in the whole wide world, working off the emotional and physical hangover of being in Houston for St. Patties Day.  This year, nothing.  My St. Patties Day consisted of going to the gym, doing some rowing, cheering on folks doing their 13.2, then sitting around and shooting the breeze with my gym homies while drinking margaritas.  Seriously, have I mentioned that I completely love that bunch?  Because I do.

So this year, my Spring Break is packed full of couch sitting, book reading, cooking when I feel like it, and beautifying myself!  I literally have an appointment every single day….so NEXT week when I hit up Austin, TX for the PaleoFX conference, I’ll be even more smokin’ hot that usual!  I can’t freaking wait for that!!!  I’m going to be such a stupid fan girl about the entire experience….ugh.  I can see it now….

Confession time:  I’ve been eating a TON of sugar lately.  I’m blaming it on hormones.  In all seriousness though, in the last 5 days, I’ve made 2 batches of that avocado chocolate pudding…..and a chocolate hazelnut pie (that I PROMISE I’ll post here when I make one that sticks around long enough to be photographed…) and ALL of it is gone.  In my defense, I shared the pie with the gym and my parents, but STILL!!  Get a GRIP Meister!  Damn.  I just bought 2 legit bikinis…which is an entirely foreign concept for me, and all I can think about is freaking sugar…..when I should be thinking “2 piece, 2 piece, 2 piece…..”  Whatever.

I made this chicken Marsala tonight.  Actually, there is not REAL Marsala wine in it, but heck, it’s essentially the same thing.  No big deal.  It’s so good.  Anytime onions and mushrooms can get all caramelized and delicious together, count me IN!  Not to mention, it includes some ghee….which is a new love of mine.

chicken marsala

Chicken Marsala

  • 4-5 chicken breasts, pounded thin (1/2 to 3/4″ thickness)
  • 1 pound mushrooms, sliced (use whatever variety floats your boat)
  • 2 medium yellow onions, sliced
  • 4-5 cloves garlic, minced
  • 5-6 sprigs fresh thyme, leaves stripped off the stems
  • 1/2 teaspoon dried oregano
  • salt and pepper to taste
  • 2 tablespoons olive oil
  • 2 tablespoons ghee (or grassfed butter, or leave it out if delicious butter flavor isn’t your thing)
  1. Pound out your chicken breasts so that they are thin, 1/2 to 3/4″ thick.  Lightly salt and pepper both sides.
  2. In a large skillet, add 1 tablespoon of olive oil and 1 tablespoon of ghee and let it warm up.
  3. Place chicken in your skillet.  You may have to do this in 2 batches depending on how big your chicken ended up getting.  Cook 2-3 minutes on each side.  This should cook it almost all the way through since you pounded it out so thin!
  4. After chicken is cooked/browned on both sides, remove from pan.
  5. Add the additional olive oil and ghee to your pan, let melt.
  6. Toss in onions and begin to saute, 3-5 minutes.
  7. When they start to soften up, add in your mushrooms.
  8. Let onions and mushrooms cook together until they reduce down in size and begin to caramelize.  This may take 15-20 minutes.  It’s WORTH IT!
  9. When the are all caramelized goodness, or when you hit 20 minutes in on it, add in your garlic and your herbs.  Stir it all in to combine and cook for another 5 minutes.
  10. Add back in your chicken and cover it with the onion and shroom mixture.
  11. Cover and cook on low for an addition 5 minutes or so or until you are ready to serve.
  12. Plate it up and ENJOY!!  I served mine over baby spinach leaves.  They got all wilty and delicious when I topped them with the steaming chicken and veggie goodness!

I’ve got tons of yummy leftovers from that one!  Can’t wait to get after them later in the week!  I’m terrible at planning meals during breaks, so it’ll be nice to have an actual meal rather than throwing together some lunchmeat, a sweet potato, and some nuts.  Typical.  Just like snow days….Anyways, back to rendering bacon fat!  Sending delicious Marsala love! Peace, Love, and Paleo.

-Meister

Weekend love and Chocolate Pudding

crazy socks

Check out my socks!!  Aren’t they obnoxious?  I love them…. I went into the gym this morning, with a goal in mind for my performance on the 13.2 workout.  I walked out of the gym having smashed that goal….by almost another full round.  Looking back, I think I could’ve pushed myself harder and finished out round 6, but I’m not displeased with my performance this morning!  I’m actually pretty proud!  So naturally, I went to grab food with some folks from the gym…..duh!  I had a crazy delicious gluten-free cinnamon roll and some insane corned beef hash.  SO GOOD!  Not paleo, sue me.  I’d earned it though!  So now I’m just kicking it, on my couch, letting my belly and my body recover from this morning!

Exciting news in the world of PaleoMeister…….I put my first shirt order in this morning!  Can’t wait for people to be sporting my gear!!  I think it automatically just makes you sexier, but I might be a wee bit biased.  Regardless, I can NOT say thanks enough to the folks that ordered a shirt.  It truly means so much to me that you believe in either me or what I’m doing enough to rep my brand.  HECK YES!  Ooooh!  Also, my 25 pound box of almond flour showed up on my doorstep yesterday.  Can’t freaking WAIT to get started into that bad boy!!!  It is taking up a major portion of my freezer and fridge right now….seriously, I need to invest in a chest freezer.  And yes, I realize that it totally looks like I’m slangin’ drugs…..soooooo funny!  That, my friends, is six, yes SIX gallon sized bags full, plus my regular container that stays in my fridge…..it’s insane!!

almond flour

This past week, I’ve been MAJORLY craving sugar and Thursday I finally caved and made some avocado pumpkin pudding.  It was STUPID delicious.  I promise, it looks absolutely disgusting, but it is ridiculous…..try it!  Don’t let the name or the thought of flavor combos scare you.  I promise you won’t be disappointed!!  SEE!!  It looks (and tastes) magical!

avo pudding

Avocado Pumpkin Pudding

  • 2-3 ripe avocados, seeded and cut into small pieces.  You want to use SOFT ones so they blend better, so get the ones that are really ripe (I used 2.5 avos, because that’s what I had around my kitchen)
  • 1/2 cup pumpkin puree
  • 1/4 cup almond butter (or sunbutter)
  • 4-5 tablespoons raw honey (depending on how sweet you like it)
  • 4 tablespoons unsweetened cocoa powder (more if you want it more chocolate-y)
  • 1/2 teaspoon cinnamon
  • 1 teaspoon salt

***You can do this either in a large mixing bowl, or in a food processor.  If you want it really smooth, I’d use the food processor.  Just dump all ingredients in the processor and blend until smooth, scraping down the sides a few times.  If you are cool with it having some texture and still having some bits of avocado, use the bowl.  I used the bowl.***

  1. In a large mixing bowl, smash your avocados until they are a smooth paste.
  2. Stir in your pumpkin and almond butter.
  3. Add in your honey and cocoa powder.
  4. Sprinkle in your salt and cinnamon.
  5. Taste it.  If you want it a little sweeter, add some more honey.  More chocolate-y?  Add in more cocoa powder.  Just be sure to add it slowly and mix well with each addition.
  6. Let it sit in the fridge for an hour to let the flavors really come together.
  7. Smash!  And then hide the remainder in the the back of the fridge so you don’t eat it all in one sitting.  Seriously, I’ve done it.  It’s insanely good!!!

I really hope you like this as much as I do!  If you can get past the fact that you are eating avocados and chocolate, it’s crazy good.  I was a pudding fiend in my former life, so this is a REALLY good fix for me!  Be looking for another chocolate treat in the next couple of days!!  I’ve got a terrible sweet tooth, due to that magical week of the month…..so I’m trying out a Chocolate Hazelnut pie recipe for tomorrow.  Eek!! Sending chocolate sugar craving love your way!!

-Meister

Wishing for SPRING!!!

Ok, so I know I’ve been complaining a bit about being OVER winter, well apparently, nature decided to bitch slap us one last time this past Sunday.  It got all sorts of crazy with snow and wind and even some ice!  It seemed like it came out of nowhere!  I mean, maybe the news people were talking about it, but I’ve been making it a habit to NOT watch the regular news.  It bums me out, big time!  I usually just watch the Daily Show and the Colbert Report during that time slot instead.  Much much more entertaining!  Anyways, the crazy weather granted us one last snow day.  Don’t get me wrong, I enjoyed not working on Monday, but I feel like it has done nothing but put me a day behind with everything.  As we speak, I’m staring at a pile of student work folders that needs to be graded, and I can’t quite find time in the day to get all of it done!  I’m completely kicking myself for letting things pile up…..UGH!  WHEN WILL I LEARN!??!?  Meh, only two more days of teaching then spring break!!  I am going no where, I’m doing nothing, and I couldn’t be more excited!

Needless to say, I’m really really itching for actual spring to show up.  I’ve been already getting the craving for grilled food, I’ve been naturally not feeling the heavy comfort “winter” type foods as much, and I’m LOVING the fact that it is still really light out when I leave the gym in the evening!  Best feeling EVER!!  The only thing that sucks about it is that I can’t seem to fall asleep at a reasonable hour, so I’ve been hitting the Natural Calm pretty hardcore.  Oh well, I suppose it’s something I should take regularly anyway….it IS helping me get much more restful sleep.  Which I guess would be a great thing to have ALL the time!  Yes, I shall continue with this routine.  It’s better for everyone involved.

In the spirit of spring coming, I decided to make this AMAZING chicken stew with lots and LOTS of green herbs, peppers, and veg in it.  Hence the name “Green Chicken Stew”.  No, the chicken is not green….that would be extremely bad and makes my guts hurt just thinking about it!  GROSS!  This stew is hearty, yet pretty light.  It’s very citrus-y and bright tasting, and I can’t get over how freaking awesome it turned out!  Naturally I garnished it with green things as well…..duh, I want spring folks, and I’m doing anything I can to con myself into it coming (including refusing to wear a real coat anymore…..seriously, I’m done).  Here it is!  Enjoy!!

Green Chicken Stew

Green Chicken Stew

  • 1 pound chicken, diced (used thigh meat, but you could cut up any chicken you dig)
  • 10-12 tomatillos, husks removed and quartered
  • 2 poblano peppers, diced
  • 4 Anaheim peppers, diced
  • 1 jalapeno, diced very fine
  • 1 medium onion, diced
  • 4 cloves garlic, minced
  • 1 quart stock (I used veggie stock, because that’s what I had, chicken stock would rock too)
  • 1 teaspoon cumin
  • Salt and pepper to taste
  • 2 limes (more if you want to top it with lime)
  • Fresh cilantro and avocado (for garnish)
  1. In a soup pot/dutch oven, heat 1 tablespoon of coconut oil.  When oil is melted add your tomatillos.  Saute until they are soft, about 5 minutes.
  2. Remove tomatillos from the pot and put them in either a food processor or blender…..don’t blend yet or they will shoot everywhere!  Wait till they cool a bit, trust me.
  3. In your pot, add a bit more oil (if needed) and toss in your peppers, onion, and garlic.  Saute for 5-7 minutes or until your onions become a bit translucent.  Remove them from your pot and put in a bowl.
  4. Add your chicken to the pot and brown a bit on all sides.  Don’t sweat it if your chicken doesn’t cook all the way through, it’ll have plenty of time to simmer.  While your chicken is browning, season it with some salt and pepper.
  5. When chicken is browned, add back in your peppers and onions.  Blend your tomatillos until pretty much smooth and add that to your pot.  Stir to combine.
  6. Add in your cumin and squeeze the juice of your 2 limes into the pot.
  7. Stir everything together and add in your stock.  I would add enough to make the soup to the thickness you like.  If you want more of a stew, add less liquid….if soup is more your style, add a little more.
  8. Let that bad boy simmer for about 20 minutes.
  9. Bowl it up, top it with some avocado, some fresh cilantro, and a squeeze of lime and ENJOY!!

I hope you enjoy smashing on this soup.  I have a container in my freezer and two more in my fridge!  It’s so lime-y and delicious and just screams for spring!!  Sending you tons of fresh spring love!

-Meister

Abandonment Issues…..

Well friends, I sincerely apologize for abandoning this site for the past week.  Although, in my defense, I kind of called it ahead of time….”slow” weeks on the calendar ALWAYS end up crazy for me!  I told you so!!

Anyways, this past week was great.  Got a lot of work done, continued to help at the gym, officially began my CrossFit Open pursuit, and bought some really fun new stuff yesterday!  I’m completely loving the new gym space, and I keep telling people about it every chance I get.  For REALZ, the new and improved CrossFit Artis is going to be insane when all is said and done!  I mean, it’s already pretty freaking awesome….but it’s only gonna keep getting better!  Jon and Jen have built an excellent community that I’m proud to say I’m a part of!

Speaking of community, I’m truly grateful to have been a part of the 13.1 Open workout yesterday.  It was so great to see so many of my friends getting AFTER it and giving it their all.  I loved cheering for and counting reps for them.  The entire building was just oozing determination.  My performance was, eh, well it just was.  I was kind of upset with my personal performance at first, but when I really took a step back and looked at it, I’m OK with it.  Considering I only started this entire CrossFit journey about 8 months ago, and prior to that I had never touched any sort of weight lifting equipment in my entire life…..where I’m at is pretty good for me.  That being said, I’m not getting complacent.  I’m obstinate enough to not be happy with myself, and continue to push to improve.  If ANYTHING, that is what has pushed me to this new place in my life….never settling.  So, I’ll be DAMNED if I can’t snatch 75 pounds by the Open next year.  I’ve done it before, but all things considered, it wasn’t happening on Saturday.  Whatevs.  I’m cool.

This week is going to be full of cooking and baking!  That means lots of recipes for you guys! Yay.  That being said, I’m gonna be honest and say that I may not be able to post again until Wednesday.  We are sending my last childhood pet to kitty heaven tomorrow night, so needless to say I’ll be a mess.  I’ll be doing good to not just stuff my face with chips and tequila.  Pets make me so emotional, but I suppose that’s a good thing, and proves that I’m really NOT harboring a cold, dead, heart of ice.  Tuesday night, I’ll be baking a ton for a baby shower at school.  Depending on how things go that evening, I might have something fantastic for you, but no promises until Wednesday!  I promise I won’t neglect this for another whole week like I did last week.  That was a real jerk move on my part.  Sorry friends.

So, food time!  I made the bacon wrapped brussels sprouts because I got a shout out about making them on my Facebook from my friend Brooke.  Not gonna lie, these were AMAZING!  Nothing is better than a veggie roasted in bacon fat, NOTHING!!

bacon brussels

Bacon Wrapped Brussels Sprouts

  • 1 pound bacon (I get the good stuff….none of that crap with nitrates and such)
  • 25-30 small brussels sprouts (trim of the stems and remove a few of the outer leaves)
  • 25-30 toothpicks
  1. Preheat your oven to 350 degrees.
  2. Line a baking sheet with aluminum foil.
  3. Cut your bacon strips in half in order to double the amount of bacon.  If you have 12 strips, then you will get 24 pieces, therefore you are able to wrap 24 brussels.  Make sense?  I hope so.
  4. Wrap each brussel in a half strip of bacon and secure the bacon into the brussel with a toothpick.  Some are more fickle than others and will need a couple of toothpicks.  Don’t be ashamed to jam like 3 or 4 in there….no judgment!
  5. Arrange on your baking sheet and bake for about 30 minutes.  You will want to bake them until the bacon is cooked fully.  This is why you want smaller brussels, if they get too big, they won’t cook through in the amount of time it takes the bacon to cook.
  6. Remove the toothpicks and enjoy!  I ate mine with a giant hunk of sirloin.  Nothing like meat with a side of meat!

These are super easy to make and are SUPER delicious!  Hope you enjoy them as much as I did!  Sending bacon love!

-Meister

Lazy + Cold = Easy Dinner 2fer

burrito bowl

So, I’m currently typing this with gloves on….no joke.  They are purple and pink, and have princess crowns on them.  Pretty sure my parents gave them to me as a gag gift stocking stuffer a couple of years ago.  My hands are SO FREAKING cold!!!  Actually, all of me is cold, and I can’t seem to get warm.  Tonight is definitely going to be a night where I sleep in long pants and long sleeves……which is EXTREMELY rare for me and probably means I’m dying.  And as far as the gloves go, well, they were closest thing at hand (no pun intended).  They were already out, since little brother wore them to shovel the driveway  when it snowed last.  He’s secure in himself and will rock some sweet princess gloves whenever he feels like it.

Speaking of little brother, he made the comment that I need to work on my food photos.  Duh.  I know this.  I never claimed to be a food photographer.  In fact, much of what you see on this page is pics that I snap of my food immediately prior to me stuffing my face with it!  Which also accounts for some ridiculously sized portions….don’t judge.  Sometimes, a girl just needs to smash.  Got it?  But nevertheless, my most sincere apologize for my crappy food pics.  I’ll work on it….eventually.  Promise!

The recipes I’m posting tonight are kind of a “choose your own adventure” dinner.  I started off by being super lazy and making the chicken in the crockpot, with the intention of making tacos.  Then I got home Monday night, said screw it, and cooked up some cauliflower rice….and BOOM!  The burrito bowl was born.  Skip to tonight were I was feeling lazy again….so I stuffed the leftovers into peppers and just popped them in the oven.  Easy eats are the tastiest kind!!  So here they are.  Eat them all together, make them separately, do whatever your heart desires! Just get down with your paleo self.

stuffed peppers

Crockpot Spicy Pulled Chicken

  • 2 pounds frozen chicken (I used all breast meat, but you could use thighs as well, or a combo)
  • 2 cups prepared salsa (use a brand without a bunch of extra crap in it, or make your own….choose your heat level to suit your tastes)
  • 2 small cans diced green chiles (do not drain these!)
  • 1 jalapeno, seeds and ribs removed, diced
  • 1 tablespoon chili powder
  • 1 teaspoon cumin
  • 1 teaspoon dried cilantro
  • 1 teaspoon onion powder
  • 1 teaspoon garlic powder
  1. Place frozen chicken in crockpot.
  2. Cover chicken with all remaining ingredients.
  3. Set your crockpot to LOW and cook for 8 hours. Mine went for 8 hours, then I had little brother turn it to WARM when he got home….and it was on that setting for another 2 hours.
  4. Shred chicken with a fork!

Cilantro Lime Cauliflower Rice

  • 2 smallish heads of cauliflower
  • 1 small yellow onion, diced
  • 4 cloves garlic, minced
  • 1 bunch fresh cilantro
  • 2 limes
  • Salt to taste
  1. Using the chopping blade on a food processor (or you could grate it by hand, but that would SUCK hardcore) in small batches, add your cauliflower and pulse it until it looks like grains of rice.  I had to do this in about 4 batches.  No worries. I just dumped it all into a big bowl until I had pulverized all of it!
  2. In a deep skillet, heat 2 tablespoons of coconut oil over medium high heat.
  3. Saute onions and garlic until they begin to get a bit of color and start to soften….about 5 minutes.
  4. Add in your “rice” and stir it around in the onions, garlic, and oil.  It’s cool if your pan seems over-loaded, it actually helps to create some steam.  Continue to stir it every couple of minutes until the rice begins to soften up a bit and gets to a texture that you like for cooked rice.  Mine went for about 7 minutes or so.
  5. Squeeze the juice of your limes over your rice and toss in the chopped cilantro.  Continue to cook with these ingredients for another 5 minutes.
  6. EAT!

To make the burrito bowl:

  1. Serve up some rice in a bowl.
  2. Top it with some of your chicken.
  3. For toppings, I added some more salsa, some chopped lettuce, some Sriracha, some cilantro, and some avocado…DUH.
  4. Mix it all up until it’s just a mess of delicious food and SMASH!  Relish in how awesome your cooking abilities are, and how that “chain restaurant” that offers a similar burrito bowl, ain’t got NOTHING on you!

To make the stuffed peppers:

  1. Preheat your oven to 375 degrees.
  2. Cut the tops off of 4 green peppers, and pull out all seeds and ribs, but leaving the pepper in tact as a cup.
  3. Stuff each pepper about half way full of your leftover rice.
  4. Top each pepper with your leftover pulled chicken.
  5. Arrange in a glass baking dish.
  6. Put about 1/2 inch of water in the bottom of your dish to create some steam while cooking.
  7. Bake for 30-35 minutes (or until peppers are cooked to desired done-ness….I like mine on the crunchier side, so I actually pull mine out at about 25 minutes)
  8. Top with whatever toppings you choose!  I used the same ones I topped my burrito bowls with.

Hopefully this gives some options to play around with!  It was all STUPIDLY easy, and aided in my general laziness.  Tomorrow I’m going to get all sorts of crazy and wrap some brussels sprouts in bacon….so you just wait!  Sending warm, princess glove, chamomile tea drinking love your way!

-Meister


Beginnings and Endings

A couple of major events transpired this weekend:

1. We got to demo the CRAP out of the new gym space!  Took down some walls….which mostly meant I stood around and watched dudes work!  It also means I got to play with powertools…..OH YEAH!!! Anyways, I baked for the folks working. Duh! That’s what I do!  When all was said and done, the new space is completely opened up, and the possibilities are truly endless!!  And look, here’s proof that I actually did some work…..oh who am I kidding, I can’t be serious about anything.

OHS 2 by 4

2.  Miss Olivia had her going away party.  It was a completely wonderful send off to quite possibly one of the most BAD ASS chicks I’ve ever met.  I’m super sad to see her go but am completely confident she will continue to be a BAMF in the next chapter of her life.  Hip Hop Fridays won’t be the same without her 😦  Here is a vanity shot of some of the foxiest ladies at the party…..oh wait!  Who is the creeper with devil eyes in the middle? Hmm….why do my eyes ALWAYS do that!?!?! Ugh.

pretty ladies

3.  I did absolutely NOTHING for the remainder of the weekend.  Staying out, dancing like a fool, and having just a couple of drinks totally took it out of me.  Add in the fact that I think I might be getting sick, and BOOM!  You’ve got a perfect storm that amounts to me doing NOTHING all Sunday!

Looking at the calendar for this week kind of scares me….I have nothing on my school calendar, and nothing on my personal calendar.  Why does this scare me?  Because I can’t honestly believe that I will have a week of nothing.  When these weeks usually come around, something manages to EXPLODE! Tame just doesn’t exist in my world.  I’m trying to trust that perhaps the universe has left this week open for me because the good Lord knows that I’m going to be needed to support those nearest and dearest to me.  Lots going on in the lives of those closest to me, so I’m doing my best to put as much positivity out there as I can!!

OK, onto food!  So, I made this cioppino last Thursday.  I’m trying to be a good part-time Catholic and observe not eating meat on Fridays during Lent.  This stew is freaking AMAZING!! It’s slightly spicy and totally delicious.  Typically, the best part of cioppino is dipping some crusty bread into the tomato broth, but yeah, that obviously didn’t happen!  I made some plantain chips to go with it though, and those were BOMB!!

cioppino

Quick Cioppino with Plantain Chips

To make the Plantain Chips:

  • 2 large, slightly ripe (light yellow in color) plantains
  • Coconut oil, for brushing
  • Salt (or any other spices you might want to use)
  1. Preheat your oven to 400 degrees.
  2. Line a baking sheet with parchment paper.  Brush the parchment paper with a thin coating of coconut oil. (I know this seems counter-intuitive….just do it. Trust me.)
  3. Peel your plantains. I have found it easiest to cut off both ends, then slit through the peel lengthwise.  Use your thumb to separate the peel from the plantain.
  4. Thinly slice your plantains.  Think slightly thicker than a quarter…about as thick as a half dollar.  The important thing is to try to get them all the same thickness.
  5. Arrange the slices on your baking sheet and brush the tops of them with some more coconut oil.
  6. Sprinkle with salt.
  7. Bake for 10 minutes at 400 degrees.
  8. Flip them after 10 minutes, then bake for another 7-8 minutes.
  9. Remove them from the oven and let them cool.  They get crispier as they cool.
  10. Stuff your face!  They are SUPER addictive.  I don’t ever have any leftovers….

To make the Cioppino:

  • 1 medium red onion, diced
  • 2 green bell peppers, diced
  • 4 cloves garlic, minced
  • 25 oz. jar of marinara sauce (get the good stuff without all of the added CRAP in it!  Or just use about 25 ounces of tomato sauce)
  • 8 oz. bottle of clam juice (totally gross to think about, but it makes it SO GOOD!)
  • 1 cup vegetable stock (you could use chicken stock, but I was trying to keep it meat free)
  • Pinch of red pepper flakes
  • 1/2 teaspoon dried basil
  • 4 sprigs of fresh thyme (remove the tiny little leaves from the stems)
  • 1/2 teaspoon dried oregano
  • 1 bunch fresh flat leaf parsley
  • 2 pounds of seafood (Use whatever floats your boat.  I used 2 packages of Trader Joe’s Seafood Blend from the freezer case.  Use a mix of chopped white fish, shrimp, scallops, calamari, whatever you’ve got!  Fresh or frozen, doesn’t really matter)
  1. In a large soup pot, add in your veggies (onion, bell pepper, and garlic) and saute until they are translucent, about 5 minutes.
  2. Stir in the marinara, clam juice, veggie stock, red pepper flakes, dried herbs, and thyme.  Simmer on medium low heat for about 10 minutes.
  3. Add in your seafood.  Continue to simmer until seafood is cooked through.  Cooking time will depend on whether you are using precooked/frozen vs. fresh seafood.  I let mine simmer for about 15 minutes, just for good measure.
  4. Stir in half of your fresh parsley.
  5. Serve it up in big bowls.  Top with more fresh parsley and some of those crispy plantain chips!
  6. Enjoy the briny, tomato-y goodness!!!

I shared this with one of my girls from the gym, Ava.  She totally dug it.  Pretty sure you will too!  She’s awesome, and you want to be like her…..so make this!  Sending much love and positivity!

-Meister