Chicken Bacon Deliciousness…..aka Eating your Feelings

chicken bacon mac

Hello friends!!  The past couple of weeks have been spent settling into a routine of sorts.  Basically, that means I’ve been doing nothing but reading and going to the gym.  My apartment is impeccably clean, my laundry is always done, and I’m getting into incredibly bizarre eating patterns.  I spent a good week drinking copious amounts of wine and exploring the outdoors.  Headed to Austin last weekend, and believe it or not, yours truly, Queen of Clumsy, hung out in a hammock!  Now, I don’t mean the kind that you gently just sit into.  This one involved a small bit of climbing and WHOLE lot of trust in both my own balance and weight distribution, as well as the sweet rigging skills of my companion.  In the end, there was minimal squealing, a bit of “NOPE! Not doing that!”, and whole lot of self-doubt, and one solid dose of “Suck it up Meister!”.  I owned that hammock.  Enjoyed it immensely, and then had the most UNgraceful dismount out of it that included hugging a tree, therefore scraping and bruising the crap out of my entire left arm.  Good times. No, GREAT times!

Anyways, I’ve been suffering a mild trip-hangover after returning from Austin, so I’ve been just kind of eating whatever is accessible…..until I ran out of food.  Needless to say, I’ve been wanting to eat all of the feelings.  By now, if you’ve read more than two of my posts, I’m sure you’ve figured out that “eating my feelings” = COMFORT FOOD!!

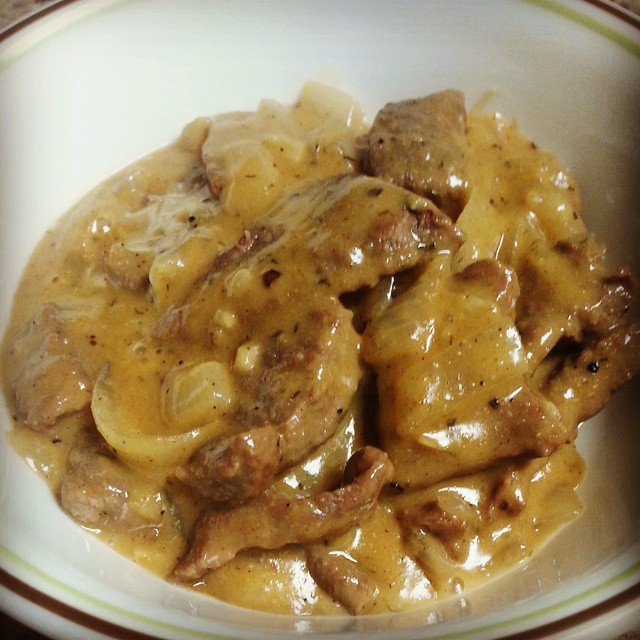
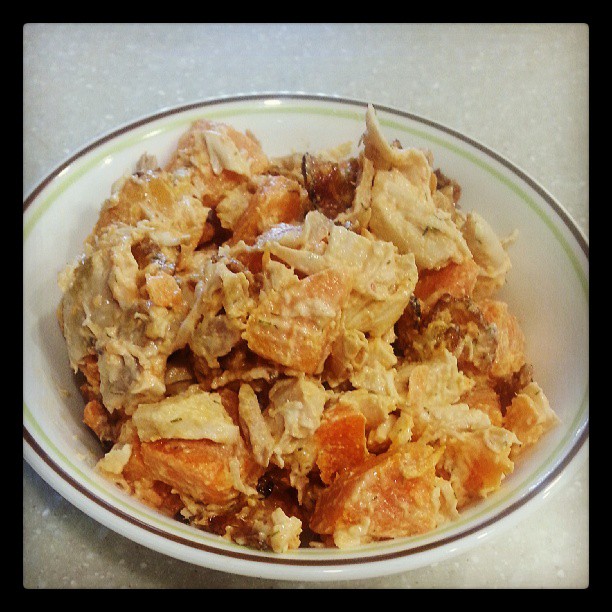
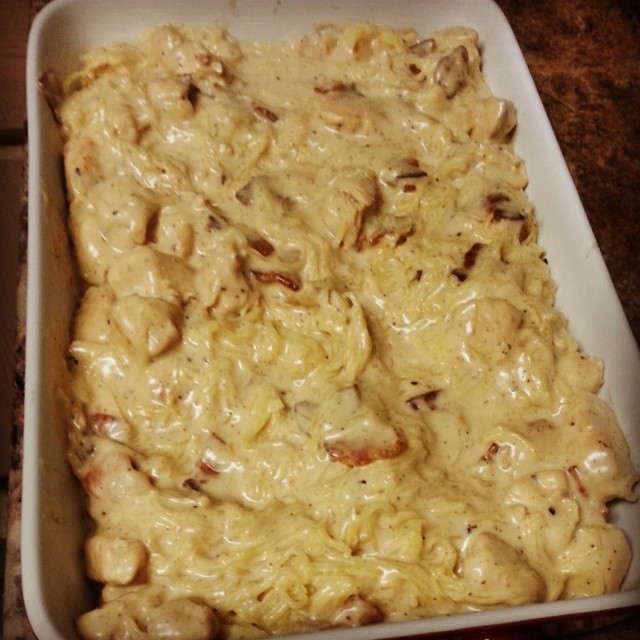
I made this insanely delicious Chicken Bacon “Mac and Cheese”.  While this isn’t technically Paleo (because it includes some grassfed/raw cheese) you could leave the cheese out and it would still be plenty delicious.  If you can’t get down with dairy, just omit it.  I won’t be offended. 🙂

Chicken Bacon Mac & Cheese

  • 1 medium spaghetti squash
  • 1.5 pounds chicken breast, cut into small chunks
  • 5-6 slices thick cut bacon, cut into small pieces
  • 1 can full fat coconut milk, make sure it’s at room temperature
  • 1 heaping tablespoon tapioca starch
  • 6-7 oz. grassfed or raw cheddar cheese, shredded
  • 1 teaspoon garlic powder
  • 1 teaspoon onion powder
  • 1 teaspoon salt
  • 1/2 teaspoon pepper
  • Optional toppings: crushed chicharonnes (pork rinds), scallions, fresh parsley, whatever your heart desires
  1. Preheat your oven to 400 degrees.  Cut your spaghetti squash lengthwise, scoop out the seeds, place facedown on a cookie sheet and bake for 20-30 minutes (or until the outer skin gives a bit when you press on it).
  2. Set cooked squash aside to cool while you prepare your sauce.
  3. In a deep skillet, heat a small amount of oil over medium-high heat and add your diced chicken.  Cook chicken until it is browned and cooked through, about 7-10 minutes. Remove chicken from skillet…..I just put mine on a plate to hang out until I needed it again.
  4. Add your diced bacon to the skillet.  Cook bacon until it is crisp, about 5-7 minutes.  Remove bacon from skillet.  You want to leave about 2 tablespoons of bacon fat in the bottom of your skillet.  If your bacon gave off a ton of grease, pour out some of it.  You want just enough to cover the entire bottom of the skillet.
  5. Reduce your heat to medium low.  Whisk your tapioca starch into your bacon grease until it is fully incorporated.
  6. Add your can of coconut milk to the skillet.  You will want to whisk pretty continuously until it is all fully incorporated.  You will notice that it will thicken pretty quickly, thanks to the tapioca starch!
  7. At this point, whisk your cheese into the sauce until it is fully incorporated and melted.  Also add in your spices.
  8. TASTE!  Now is the time to taste your sauce and adjust accordingly.  ***If you do not add the cheese, you’ll want to bump up your spices some***
  9. Mix back in your cooked chicken breast and bacon.
  10. Shred your spaghetti squash into the pan and mix ALL of the goodness together, making sure everything is coated in cheesy deliciousness!
  11. Pour everything into a rectangular baking dish (I used an awkward sized one, but a 9×13 would work great) and top with whatever toppings you choose…..or none at all!
  12. Bake at 350 for 20 minutes or until it is all bubbly and golden around the edges.
  13. Remove from the oven and let cool for about 5 minutes before smashing it into your face.  Trust me, the roof of your mouth will hate you otherwise.

Word to the wise, this makes a LOT of food.  Pace yourself on it, because it’s pretty rich and decadent.  WORTH IT!!!  In the mean time, get outside, breath some fresh air, test your limits, and scare the hell out of yourself.  The feeling of accomplishment afterwards is WELL worth the freak out during.

Peace, Love, and Paleo!

-Meister

Creating a Home and Smashing on Stroganoff.

Hello friends! I’ve officially been a Texas resident for all of 13 days and I’ve gotten pretty settled.  In that amount of time, I’ve burned/scalded a limited amount of food on my coil stove.  I’m taking THAT as a win!  I’ve also had maintenance to my apartment probably 5 times.  I’m not 100% sure the kitchen took quite this much of a beating before me, so pretty much all things in the kitchen that could malfunction did. Most exciting of which was the dishwasher!  A kitchen floor covered in bubbles is TONS OF FUN!!!  Anywho, Rico (the head maintenance guy) is my new best friend, and he’s THE MAN!!!  Got everything in excellent working order, and was hilarious to talk to while he was working.  Props to Rico!

Other than causing my kitchen to self-destruct, I’ve done a whole lot of nothing.  Ok, that’s not entirely true.  I’ve read about 5 books and worked on several crochet projects.  Oh, and drank some wine.  Ok, maybe a lot of wine.  I also found myself a new gym!  They are a really amazing group of people, and I can’t wait to make their community my own!

All that being said, I’ve been eating pretty strictly Paleo since I moved.  I’ve allowed myself a small amount of grass-fed cheese here and there, and a bit of dark chocolate, but essentially, I’m eating much MUCH cleaner than I was before I moved.  I’d fallen off the wagon pretty hard, but considering the stress of my life at that time, I didn’t really beat myself up about it.  Whatever.  I’m back on the wagon, and really feeling the benefits already!  I’m sleeping sounder, waking up with a clearer head, still dying in workouts (but I’m blaming that on the heat!), but generally just feeling more alive.  I LOVE that good food can do that to you!

Late last week, I was feeling a teeny bit sad that my family was 900 miles away.  I immediately started craving comfort food, so I whipped up this bad boy, and DANG!  It was SO GOOD!

stroganoff

This is my SUPER easy beef stroganoff!  I didn’t plan appropriately and didn’t make anything to serve it over, but it would be delicious over some spaghetti squash, on an open-face sweet potato, or over some white rice (if you are into that).  I would also probably double the recipe if you are cooking for more than 2 people.  Here it is!:

Stupid Easy Beef Stroganoff

  • 1 pound stew beef chunks (or steak cut into small chunks)
  • 1 medium onion, sliced
  • 3 cloves garlic, minced
  • 1 cup coconut milk (get the canned stuff)
  • 1/4 teaspoon dried dill
  • 1/2 teaspoon paprika (any variety will do)
  • salt and pepper to taste
  • 1 tablespoon tapioca flour
  1. In a deep skillet over medium high heat, heat 1-2 tablespoons of cooking oil (olive, coconut, etc.).  Add your onion and garlic and cook until translucent.  You want to let them go until they are just starting to brown, about 7 minutes or so.
  2. Add in your stew beef and sear until the beef is browned on all sides, another 5 minutes.
  3. When all the yummies are browned and delicious, add in your coconut milk and spices, NOT the tapioca flour!  Make sure you stir your coconut milk in well, being sure to scrape up any bits on the bottom of your pan. Reduce the heat to medium low and cover your pan.  Let it simmer for about 10 minutes, or until the beef is starting to tenderize and all flavors have come together.
  4. At this point, uncover your pan and taste for salt and pepper.
  5. In a small cup, mix together your 1 tablespoon of tapioca flour with 2 tablespoons of water.  Make sure you mix it until all clumps are gone.
  6. Pour this slurry into your beef and coconut milk mixture slowly, stirring while adding it.  You should notice it thickening up almost immediately. Allow your stroganoff to cook for about 2-3 more minutes over medium heat.
  7. Spoon it over your carb vehicle of choice and put it in your mouth!

This smacked the comfort food craving right out of my mouth!  Hope you enjoy it as much as I did!!!!  Until next time!

Peace, Love, and Paleo y’all

-Meister

Naughty Naughty Comfort Food Bliss

meatball bake

How freaking delicious does that look?! I mean, how could I NOT lead with this picture?  This, my friends, is a meatball bake.  Yes indeed!  Hidden under all of that gloriousness are meatballs.  Who would’ve known?!

Paleo confession time: I crave traditional comfort foods all the time.  Seriously, ALL the time.  For me, these foods are usually something really starchy, smothered in a red sauce and baked, or anything covered in Gravy.  I’m German and Irish.  We are gravy loving, potato smashing folks.  I can’t deny my genetics, nor can I refuse these tasty, tasty foods. So I’ve tried desperately to find ways to satisfy these cravings….and since I’ve YET to find an epic gravy recipe that comes anywhere CLOSE to being Paleo, I usually go the smothered in red sauce route to feed my hungry soul.

Paleo Confession #2:  I eat cheese.  Sue me.  Most of the time I shoot for raw milk or grassfed cheeses, but sometimes I don’t. Don’t care.  If some cheese is going to bring me to an early death, bring it on!

So my friends, enjoy! And don’t judge me too harshly for the aforementioned confessions.

Meatball Bake

     For the meatballs:

  • 1.5 – 2 pounds ground beef
  • 8-10 fresh basil leaves, finely chopped
  • 4-5 cloves garlic, finely minced
  • 1/4 cup dried minced onion
  • 1 egg, beaten
  • 4 heaping tablespoons of almond flour (can sub coconut flour, but cut to 2 tbsp)
  • Spices to taste (salt, pepper, dried oregano)

     For the sauce topping:

  • 2 cans fire-roasted tomatoes
  • 1 can artichoke hearts, roughly chopped
  • Freshly torn basil
  • Grated cheese…..if that’s how you get down
  1. Preheat oven to 375 degrees.
  2. Combine all ingredients for meatballs in a large bowl and mix together thoroughly.  Get in there all down and dirty like with your hands and get after it.
  3. Roll into balls (I made mine bigger than walnut-sized) and place in a deep baking dish.  You should be able to get around 16-20 meatballs out of the mixture.
  4. Bake meatballs uncovered for 25 minutes, or until they are browned on the outside.
  5. Remove from the oven and top with your chopped up artichoke hearts.
  6. Then layer on your two cans of fire-roasted tomatoes over the top.
  7. Put your dish back in the oven and bake for another 30 minutes.
  8. When your sauce is bubbling like crazy and starting to brown around the edges, remove from oven.
  9. Top with your fresh torn basil and grated cheese and pop it back in the oven for 5 more minutes to melt.
  10. SMASH ON COMFORT FOOD GOODNESS!……after you’ve let it cool down first of course.  It will come out hotter than the surface of the sun, and you don’t want to turn your mouth to lava.  Safety first, friends. Safety first.

There it is peeps.  Get after it!  Fill your bellies with simple goodness.  Make it happen.  And live it up with your naughty paleo selves. 🙂

Peace, Love, and Paleo.

Meister

Guess who’s back????

Well hey there long lost friends!  Clearly, I’ve been away for a bit.  Ok, who am I kidding?  I fell off the face of the Earth for a few months.  In reality, things have been pretty hectic….and while they haven’t at ALL calmed down, they seem to be settling into some sort of twisted sense of normal for me.

That, coupled with a particularly nasty case of academic writer’s block, brings be back to you!  What should I really be doing right now?  Writing my admissions essays…but NO! I made a tragically stupid mistake by looking at the degree plan of study (in depth) that I’m applying for and subsequently am having a mini-panic attack.  Joy. However, my somewhat flaky nature and ability to be scared by a PDF is GREAT for you guys….because I’m back!  If for no other reason that to prove to myself that I can still write.

If it gets rambly, my most sincere apologies.  I am just navigating through the storm of not actually having written anything for months.  Sue me.

I’m gonna do what I do best!  Serve up a healthy dose of snark and a bangin’ recipe!  With that, I give you these beauties….
bison meatballs

These little bad boys are some CRAZY delicious bison meatballs!  Now, if you are finding yourself saying, “EEEWW!  Bison!?!”  just freaking take my word for it, bison is AMAZING!  Like, life-changing amazing.  In fact, I don’t know why I didn’t get on the bison train sooner!  Now, if you can’t find bison, these could be made with ground beef….I suppose.  But if you CAN find bison (or happen to have an old friend from elementary school who was gifted a bison ranch as a wedding gift…..I mean, it could happen!) load up on as much of that stuff as you can!

Bison Meatballs

  • 2 pounds ground bison
  • 2-3 cloves of garlic, finely minced
  • 2-3 small red chile peppers, finely minced seeds and all! (you could sub 1-2 teaspoons of crushed red pepper depending on the heat level you want)
  • 2 teaspoon onion powder
  • 2 teaspoon garlic powder
  • 1/2 teaspoon ground sage
  • 1 teaspoon dried thyme
  • 2 teaspoons salt
  • Ground Black pepper….as much as you dig!
  1. Combine all ingredients in a large bowl and mix by hand.
  2. Get good and dirty making sure all spices are incorporated thoroughly!
  3. Roll mixture into walnut-sized balls.  Mine made just over 2 dozen meatballs.
  4. Heat 1-2 tablespoons in a deep skillet and add meatballs to your pan.
  5. Brown on all sides, about 2-3 minutes per side until you get a nice brown crust on each side.
  6. When meatballs are browned on all sides, I topped mine with my favorite red sauce and simmered them somewhat covered (more to protect my cooktop from splatters) on low for about 10 minutes.
  7. Toss those bad boys on some spaghetti squash and enjoy!

I hope that these are rockin’ for ya!  They were pretty much one of the best things I’ve ever made….but I’m a sucker for simple comfort foods.

Here’s to being back! Peace, Love, and Paleo!

Meister

Summer time….and the living is EASY!

Hey friends!  Well, I’ve officially somewhat settled into my summer “schedule”.  Honestly, it’s really difficult to stay on track with my eating when I have little to no structure or routine.  I’ve actually been pretty proud of myself so far this year.  I’ve been keeping myself to a regular gym schedule which makes everything else about 10 million times easier!  That being said, I’m still drinking a lot more that I’m used to.  I’m by no means getting inappropriate, but I had all but eliminated my “glass of wine with dinner” mentality…..and now that’s back.  Cider on the deck? Sure! Wine while cooking dinner? Yep! Rum buckets at the College World Series? Hell yes!  So yeah, alcohol is back in the mix.  She’s a tricky tricky devil….and makes me feel squishy.  What a dirty bitch.  Eh, I suppose I do it to myself!


I’ve also really been trying to be more spontaneous and go out more.  I became a bit of a recluse over the winter/spring months, and now that it’s summer and there is a TON going on, I’m trying to take FULL advantage of it!  Living life! Because of this, I feel like unless I have food already prepped in my fridge, I’m screwed.  Such is life.  I’ve been just making sure there is some sort of protein in my fridge at all times.  It’s veggies that I’m struggling with making sure I have enough of.  Stupid vegetables and their short shelf life…..


A few days back, I promised you something spectacular with that Dill Mayo I made.  Well here it is!  This turned out so insanely delicious.  I just kept it in the big bowl that I mixed it in and I stashed it in my fridge and ate off of it for almost a week.  Hell yes. Easy access!

potato salad

Buffalo Chicken Potato Salad….with BACON!

  • 1.5 pounds cooked chicken, chopped into bite size pieces (I used a cooked rotisserie chicken that I just picked clean!)
  • 1 pound bacon
  • 2 pounds sweet potatoes, diced into 1/2 inch cubes
  • 2-3 tablespoons hot sauce of choice (I used Frank’s….and I used way more than that amount, because I LOVE hot sauce!)
  • 1/4 – 1/2 cup Dill Mayo…..depending on how saucy you like your salads
  • Salt and pepper to taste
  1. In a large pot, put in all sweet potato chunks and cover with water.  Bring to a boil, and lightly boil for 15ish minutes.  You want your potatoes to be tender enough that a fork will poke into them, but not so over done that they smush and fall apart. When cooked, drain potatoes and put aside to cool.
  2. While potatoes are boiling, cut bacon into small pieces and cook in a deep skillet until bacon is fully cooked and crisp. (Feel free to bake/microwave your bacon as well and then just cut it into chunks….didn’t want to heat up the whole kitchen with my oven!) When bacon is crisp, remove it from the skillet onto a paper towel to get some of the excess fat off.
  3. In a large mixing bowl, combine pulled chicken, cooled potatoes, mayo, and hot sauce.  I would add the mayo gradually.  Start with 1/4 cup, get that mixed in, and the see if you want more.  I HATE super gloppy salads.
  4. When mixed well, mixed in your bacon.
  5. Taste your creation and salt and pepper according to your tastes.
  6. For best results, let this bad boy chill in the fridge for about an hour prior to eating or serving so that the flavors have time to really get into all of the ingredients.
  7. SMASH!!!!  Seriously, chicken, bacon, sweet potatoes……hot sauce! HEAVEN!

I realize it’s not the most colorful dish, but it’s damned tasty!  I ate it throughout the week as a main dish, as a side dish, in some lettuce wraps, for breakfast, lunch, and dinner.  So really, get AFTER it and live the summer high life! Peace, Love, and Paleo!

-Meister

Sweet Baby Jesus, Garlic Dill Mayo!

dill mayo

I’m not even lying when I tell you that this mayo is SO beyond insane that I stood in my kitchen finding reasons to put it on things so I could lick the spoon.  I mean really, who the hell stands around eating mayo!?!?  Apparently I do, and it’s because this stuff is FREAKING delicious!  Like completely out of control and life changing.  LIFE CHANGING FOLKS!

Honestly, I wasn’t planning on blogging tonight.  I was going to cook a simple dinner, take it easy, and just call it a relaxing night.  And then that damned mayo happened…..and I feel guilty NOT sharing it with you guys.

With that being said, there are a couple of tricks to making paleo mayo.  It can be quite finnicky, but if you just find some patience it’s really pretty easy.  Minimal ingredients, a little bit of time, a LOT of calm and love in your heart, and you have magical mayo at the end! Plus, it makes a good amount!  I can’t wait to use this to make crazy good salads!  I’m thinking some sort of sweet potato salad….probably with bacon.  OOOOOH!  Or a BLT chicken salad!  Yep, that’s happening.  Stay tuned for that one, it’s gonna be good.  I can tell already! See! So much joy, from just a little jar of mayo 🙂

Garlic Dill Mayo

  • 2 egg yolks (save the whites for breakfast!)
  • 1 lemon, juiced (you want about 2-3 tablespoons of fresh lemon juice)
  • 1 cup Extra Light Tasting Olive Oil, seriously, DON’T use regular Extra Virgin, it won’t come together correctly……you could play around with other oils here as well or combinations, but you are going to want it to be a majority of oil that will stay in a liquid state (AKA NOT all coconut oil)
  • 2 tablespoons fresh dill (or 1 tablespoon dried dill)
  • 1/2 teaspoon garlic powder
  • 1/2 teaspoon onion powder
  • 1/2 teaspoon salt

***My directions below are using a food processor.  You COULD whisk by hand or with a hand mixer, or hell, you could even use a blender, but ain’t nobody got time for that!  Let the food processor do all the work!***

  1. In the bowl of your food processor add your egg yolks and the juice from half of your lemon. Pulse it a couple of times to combine.
  2. Set the processor on the lowest setting.  While it is mixing, SLOWLY add in your oil.  Seriously, I’m talking a few drops at a time for probably the first 1/4 cup of oil added.  It WILL take time and patience!!!  Just keep the processor running!  When you have created a emulsion, the mixture will start to thicken and turn opaque.  At this point, you can begin to add in your oil a bit more at a time.  I will warn you, err on the side of adding oil VERY slowly! Once you break the emulsion by adding it too quickly, you are screwed and the mayo is trash!
  3. Once all of the oil has been incorporated (it took me upwards of about 7 minutes to get all of it added) you can stop the processor.  You should have a thick and AWESOME looking mayo!!  Yay! You did it!
  4. At this point, scrape down the sides of the bowl and add in the remaining lemon juice as well as the dill and the spices.  Pulse it a few times to mix everything into the mayo.
  5. Taste!!!  Adjust seasoning as needed, just be prepared to want to eat mayo straight off the spoon.  Welcome to being a weirdo!  Sorry to have sealed this fate for you…
  6. Store it in closed container in the fridge.  It keeps as long as eggs normally would, but seriously, I’d be surprised if mine makes it a full week in my fridge!

The uses for this are totally endless.  Like I said earlier, I’m hoping to bring you an epic mayonnaise based salad here sometime soon.  That just sounds SO FREAKING good right now, not to mention, it kind of screams summer! If all else fails, just smear some of this on top of some grilled or broiled salmon and you will be a happy little camper!  See!!

dill mayo salmon

Peace, Love, and Paleo Mayo!

-Meister

Now Introducing….the WORST blogger ever!!

Seriously friends.  I’m a giant jerk.  I haven’t posted in almost a month.  To be fair, a WHOLE lot of big stuff has happened in the past three weeks.  For starters, I had my birthday!  Yay.  I’m officially 28, so I guess that’s exciting?  Also, school ended for the year, which is always a chaotic time. So let’s do a little review in pics of what I’ve been doing that has kept me away from all of you lovely folks.  Ready? Go! I’ve been….clean bruises

Beating the crap out of myself at the gym everyday!  Honestly, it’s crazy how easily I bruise.

wildcat 5k 2013

Hey look!  I ran a 5k at my school!  Plus, I didn’t die AND I took 12 minutes off of my previous 5k….that means I finished in just under 33 minutes.  I’ll TAKE it!

road trip selfie

I headed down to Kansas City for a brief getaway.  It was GREAT!  Love that city and I LOVE road tripping!  Speaking of, stay tuned for plenty of talk about my “Tour of Texas” I’m doing in July!

Lastly, and possibly the most important thing I’ve been doing….

yard drinking

Enjoying the HELL out of my summer break!  For real. I’ve been enjoying deck beverages, yard beverages, patio beverages, beverages with friends, with family, and by myself!  It’s been amazing to JUST RELAX…..which I don’t allow myself to do much.  I’m pretty sure I could get used to this!

As you can see, I’ve been a busy busy girl!  I know I’ve said it before, but I am going to post more often.  I promise.  No, I really REALLY promise!  Anyways, regardless of all of the awesome going on lately, there have been a few things kind of bringing me down.  One of these is body image.  I am convinced that I will always struggle with it.  Always, no matter how old I get, no matter how confident I become, it’s always lurking….waiting to pounce at one moment of weakness.  That’s all a different post for a different day….but be prepared, because I feel like it’s going to be coming soon!

On to food.  To be quite honest, I haven’t really been cooking much exciting stuff lately.  Just sticking to the basics of a piece of grilled/roasted meat, some veggies, and some fat.  Pretty boring folks!  But the one thing I have been mildly obsessed with is stuffing sweet potatoes.  It’s SO FREAKING GOOD!  Not to mention super simple!  So I’ll give ya a two-fer on recipes tonight.  I owe you…….big time.  So here are two of my beauties!

pulled chicken sweet potato jalapeno beef sweet potato

Garlic Jalapeno Pulled Chicken

  • 3-4 whole jalapeno peppers, cut in half lengthwise (leave all seeds and ribs IN)
  • 4 garlic cloves, peeled and smashed (just whack them with the back of your knife)
  • 2 tablespoons dried minced onion (you could use fresh onion chunks, I just didn’t have any in the house!)
  • 1 teaspoon cumin
  • 1 tablespoon salt
  • 1 pound of chicken (I used chicken tenders….they cook faster, but you could sub breasts or thighs….the cooking time might be a bit different)
  1. In a large dutch oven or stock pot, fill with 4-6 cups of water.
  2. Put ALL ingredients OTHER THAN the chicken into the pot and bring to a boil.
  3. When the water is at a rolling boil, carefully drop your chicken in. Turn the heat back to Medium and continue to boil for about 30 minutes.
  4. To test if chicken is done, simply remove a piece of chicken and split it apart at the thickest part. If it’s not done, just toss it back into the cauldron!
  5. When chicken is cooked through, remove from the pot and allow to cool before shredding by hand.

This turned out slightly spicy and totally delicious!  Not to mention, it can be used for any number of other recipes.  In fact, I scrambled some of the leftover chicken into my eggs the next morning!  Boom.  Plus, it was damn good stuffed into a baked sweet potato and topped with fresh guacamole.

Jalapeno Lime Ground Beef

  • 1 pound ground beef
  • 1-2 jalapeno peppers, seeds and ribs removed, finely diced
  • 4 limes, juiced
  • 1 tablespoon dried minced onion (could sub fresh…about 1/2 an onion, just didn’t have any!)
  • 1 teaspoon cumin
  • 1 teaspoon chili powder
  • 1/2 teaspoon garlic powder
  • Salt and Pepper, to taste
  1. In a deep skillet, brown your ground beef.
  2. When beef is almost cooked through add in the remaining ingredients and mix together well.
  3. Turn your heat back to Medium-Low and simmer your ground beef for 8-10 minutes until most of the liquid has evaporated.
  4. Taste, and salt and pepper as needed!
  5. Stuff it in a baked sweet potato and SMASH!

Alrighty, well hopefully I’ve gone and made a bit of amends……I promise not to desert you again! Plus, there will probably be a dessert of some sort coming soon.  I will be selling baked goods at a competition being held at my gym on June 29th, so I will be a baking MACHINE in the next couple of weeks!  Lucky you 🙂 Get out there and enjoy your summer! Peace, Love, and Paleo!

-Meister

Birthdays and Bacon

Oddly enough, the two go completely hand in hand!  I’m sitting here, writing to you all on the eve of my 28th birthday.  I remember a time when I thought, “Damn! 28 is SO OLD!”  Ha.  Right.  Don’t get me wrong, I still don’t know how I feel about getting closer to 30, but I feel awesome about my age.  That being said, I feel like 27 is going to be a very hard year to beat.  I discovered CrossFit, went fully Paleo, and began reclaiming my life as my own while I was 27.  I traveled, I met TONS of amazing people, I launched a blog, and I have tried my hand at selling my Paleo baked goods.  For real, 27 was pretty stellar.  So, BRING IT 28! You had better be freaking awesome, because you have some major expectations to rise up to!

On to bacon.  I can’t express enough how much I love bacon.  Hell, I have a bacon figurine that sits on my desk at school that I refer to as my “boyfriend”.  Several of my students have commented that they are bringing me bacon tomorrow as birthday gifts.  That is just weird to me….and unless it is in an unopened package, will NOT be consumed by me.  I ain’t dumb.  I love em, but I don’t trust middle schoolers with food handling or prep of ANY kind and I don’t really want to spend my birthday in the bathroom.

Couple of exciting things are going down!  The first is that I will be selling my Paleo treats at CrossFit Artis during “The Duo” event on June 29th.  Check out their page for info!  It’s going to be an AWESOME day!  Not to mention, I’ll be there, slinging treats.  What can beat that?!? Nothing.  That’s what. Not a damn thing.

Secondly, I recently bought what I like to call “almost booty shorts”.  This is HUGE for me.  I can’t even begin to describe how huge this is….I mean, I spent the better part of my life HATING my body, especially my thighs.  Let’s face it. They pretty much dominate my legs.  Anywho, I’ve apparently begun to embrace them OR I’ve quit caring what people think, because after the one ridiculously hot day this past week, I put my foot down and went out and bought some shorts!  No more WODing in capris.  It’s too freaking hot! So yeah, if you happen to be around the gym and you catch me in spandex, deal with it.  I have, and they are kind of making me feel awesome…..so if you rain on that for me, I might have to punch you square in the face! 🙂

Back to bacon.  I made this bacon egg scramble tonight to eat for breakfasts for the remainder of the week, and it was SO GOOD!  Plus, it was stupid easy to make.  I know the picture kind of sucks, but trust me, get after it!

bacon egg scramble

Bacon Breakfast Scramble

  • 8 strips bacon, diced
  • 6 eggs, lightly beaten
  • 2 bell peppers of choice (I used a little red, orange, and yellow) diced
  • 1 small onion, diced
  • 2 cloves garlic, minced
  • 1 tablespoon hot sauce (I used Frank’s Red Hot)
  • Salt and Pepper to taste
  1. In a deep skillet, cook up your bacon pieces.  The time will vary based on the thickness of your bacon, heat of the pan, etc.  Just be careful not to burn your bacon.  That’s a most tragic event.
  2. When your bacon is crisp, remove it from the skillet, leaving the bacon fat behind in the pan. Place it on a paper towel to drain some of the grease off.
  3. Add your peppers, onions, and garlic to your skillet.  Saute the veggies in the bacon fat for 5-7 minutes over medium high heat, or until they become translucent and begin to soften.
  4. When you veggies are cooked through, add back in your bacon. Cook together for a couple of minutes.
  5. Lastly, add in your scrambled eggs and your hot sauce.  Scramble the eggs into the mixture, keeping it moving around your pan so it doesn’t burn.
  6. When your eggs have cooked through, (3-5 minutes later) taste it for salt and pepper.  Season to your liking and serve!

I am planning on topping mine with some fresh avocado and smashing on breakfast like a CHAMP!  This is going to be a birthday breakfast of champions!  Enjoy your bacon, your thighs, and your birthday! Because I’m going to enjoy the HELL out of mine! Peace, Love, and Paleo.

-Meister

Teacher Appreciation and Pepper Steak

appreciation

This is one of the most awesomely crafted phrases I have EVER had a student write about me.  LOVE this kid, and his way with words!

Not sure if you knew this, but apparently this week is all about appreciating folks like teachers and nurses.  It’s been a pretty great week, albeit completely crazy.  I feel like I’ve done nothing but look at my computer screen and work on paperwork and files, BUT about the time I start feeling like garbage about it, I get something like that pic above.  Faith restored.  Honestly, middle schoolers are the freaking greatest. Hands down.  They warm my heart.

You know what DOESN’T warm my heart?  The sound of my bank account screaming for mercy…..which it is doing a LOT of lately.  No joke.  Thank the good Lord I’m going out of town with my parents this weekend, or I’m not sure how I would eat.  Mostly likely I’d live off of homemade almond butter and canned tomatoes, because that’s all that is in my house.  Oh! And almond flour…..lots and LOTS of almond flour.  So if all else fails, I’m gonna be living on trash.  Great.  Naturally, what do I do when I have no money?  Buy concert tickets, DUH!!!  No but seriously, I put a pair on tickets on my credit card tonight.  I didn’t even blink an eye.  It needed to happen.  I mean, it’s to see She & Him.  They are pretty much amazing, and it’s at an outdoor venue….double win.  And the ultimate grand prize?  Tilly & the Wall is opening.  They may be my favorite band.  EVER.  EVAAAAAAAAAR!  So see?  I really had no choice.  Eh, that’s what credit cards are for, right?

I’m going out of town again tomorrow afternoon.  Driving up to Minneapolis again, but this time with the family.  We are all heading up for my cousin’s graduation.  It’s gonna be a blast.  I just love that city so much…..swoon! The kicker is that since Mother’s Day is on Sunday, I need to figure out how to make a 6 hour car ride home AMAZING for my mom.  Pretty sure it’s going to include a lot of leaving her alone……or singing to ridiculous musicals in the car, and giving handmade cards (because that’s all I can afford….).  Hell, I might even get crazy and write some EPIC Mom haiku’s for recitation on the car ride! I’m getting excited just thinking about it.

Speaking of Moms, mine is pretty awesome.  She was at the grocery store and noticed that they had grassfed beef….so she bought me some.  How sweet is that?  I mean, I think that’s pretty freaking adorable.  So this pepper steak is completely owed to her because she purchased the meat.  Love ya Ma!

peppersteak

Pepper Steak Stir Fry

  • 2 medium red bell peppers, sliced
  • 2 medium green peppers, sliced
  • 1 medium to large onion, sliced
  • 3 cloves garlic, minced
  • 1 pound-ish beef, I used strip steak, thinly sliced
  • 1/4 cup coconut aminos
  • 1/4 cup apple cider vinegar
  • 1 teaspoon onion powder
  • 1 teaspoon garlic powder
  • 1/2 teaspoon pepper
  • 1/2 teaspoon Chinese Five Spice powder
  • 1/4 teaspoon crushed red pepper flakes
  • salt to taste
  1. In a deep skillet, heat 1 tablespoon coconut oil.  When skillet is hot, add beef strips and season with a bit of salt and pepper.  Stir fry until the beef is browned on all sides, about 5-7 minutes.  Remove beef from the pan.
  2. Add another tablespoon of coconut oil to the pan drippings.  When melted, add in your peppers and onions.  Stir fry for about 5 minutes.
  3. Add in the garlic and cook until all veggies are beginning to soften and brown a bit on the edges.
  4. While veggies are cooking, in a small bowl (or a measuring cup) combine the remaining ingredients to make your sauce. Top it off with water to create 1 cup total of liquid.
  5. Add back in the beef to the skillet and combine well with the veggies.  Pour the sauce over the mixture and let simmer on medium until the sauce begins to thicken and coats all of the meat and veggies.  Depending on how high your heat is, this could take about 10-15 minutes.
  6. Bowl it up and smash!!

You could also serve this over cauliflower rice or spaghetti squash.  Any way you serve it, it’s gonna be delicious!  I suppose I should go think about packing for my trip and getting things all ready to go for another weekend away. Wishing everyone a great weekend, and don’t forget to love on your Mom! Peace, Love, and Paleo!

-Meister

Apologies, Insanity, and Crockpot Cooking

Holy CRAP!  So it’s been over a week since I’ve been on here…..my apologies.  For real, I feel like kind of a dick about it.  My life went from super calm and peaceful with seemingly TONS of down time to COMPLETELY FREAKING INSANE in the course of a couple of days.  I’ve just been all over the place, putting out fires left and right, and pretty much going into survival mode.

Couple of things to keep y’all updated and give you a taste of what I’m dealing with:

  1. Mexico is a NO go.  Which totally sucks.  Ultimately it was a money thing.  I mean, don’t get me wrong, I LOVE what I do, but while public education pays the bills, it doesn’t always allow for extra expenses…..like a trip to Mexico when the cost of an all-inclusive resort was grossly out of your price range.
  2. Subsequently, due to lack of Mexico trip and lack of funds…..the “Cancun Challenge” is also no longer going.  I am still committed to rocking the paleo way, but I’m allowing myself a drink or two at special occasions as well as a bit of natural sugar every once in a while.  That being said, MINIMAL cheats, again only for special occasions, and still never any gluten.
  3. The end of the school year is rapidly approaching.  As I sit here typing this, I have 14 days with students left.  In that 14 days, we have 2 fieldtrips, final exams, 6 parent meetings, final reports to write on 10 of my students, OH! and I have to find time in there to clean and pack up my classroom.
  4. Toss a couple of roadtrips to Minneapolis in there and I’m quickly becoming an over-scheduled crazy person.

Speaking of roadtrips, I escaped to Minneapolis this past weekend and it was glorious.  I hung out with some of my nearest and dearest guy friends, and had an amazing weekend full of epic deep conversation, excellent food, Cinco de Mayo celebrations, wearing sweatpants, and consuming mass amounts of hard cider and playing on playground equipment.  It was maybe one of the greatest weekends in a very long time!  Here are just a couple of pics from the weekend…..both food related of course.

   paleofail    cincofeast

Those Strongbows were purchased purely because they were the only cider available in a tallboy can….and that pic on the right is the EPIC Cinco feast we made.  It’s all topped off by some freaking delicious bacon avocado pico deliciousness that the boys and I just made up on the spot.  Out. Of. Control.  Did I mention I love those boys?  Because I do…..mostly because we got to cook together, drink together, and they indulge silly ideas like bacon avocado pico, microwaving avocados, and swinging on swings with a drink in your hand.  That’s friendship.  We also made sure to music bomb the bar we hung out in with plenty of Rick Astley, Carly Rae Jepsen, and Miley Cyrus.  Yeah, we’re those guys.

Enough rambling….on to food!  I am going to apologize in advance for this picture, because it looks really gross.  I promise, it’s so ridiculously good though.  I just suck at taking pics.  Not to mention this is SUPER easy.  I prepped it at night and let it cook overnight so it was ready in the morning.  Boom.  Instant lunches ready to go!

chickenpicatta

Crockpot Chicken Picatta

  • 1.5 pounds boneless skinless chicken breast, cut into large chunks
  • Juice of 3-4 lemons
  • 1/4 cup plus 2 tablespoons ghee (or grassfed butter if that’s your thing!)
  • 1 medium onion, cut into large pieces
  • 3-4 cloves garlic, rough chopped
  • 2-3 tablespoons capers, plus some of the liquid from the jar…about 1 tablespoon
  1. In the bottom of your crockpot, put your onions and garlic.
  2. Layer your raw chicken in on top next. Season it with some salt and pepper, to your tastes. (You could put your chicken in frozen, just add about 2 hours onto your cooking time).
  3. On top of your chicken, add your capers, lemon juice, and chunk up your ghee and make sure you evenly distribute it.  It’ll help it melt more evenly.
  4. Cook on low for about 6 hours.  If you are going to go longer than 6 hours, I would add in some additional liquid.  Probably 1/2 cup – 1 cup of chicken stock.
  5. Serve it up with some spaghetti squash and enjoy a buttery delicious CRAZY STUPID EASY meal!

There it is folks!  I promise to try to get on here more than once a week.  That’s just rude on my part, and I apologize for being a dick like that.  In the mean time, cheers to good friendships, good food, and letting out your inner kid! Peace, Love, and Paleo!

-Meister